
Phoscon ZigBee Gateway AKA – ConBee or RaspBee – Part 3: Connecting a Device to the Zigbee Network

Welcome to the 3rd part of a series on the Phoscon ZigBee Gateway.
At the conclusion of this part, you should have a functional Zigbee network. I.e. Buttons, sensors or timers that can control Zigbee endpoints like lights, switches or plugs.
This installment will be very picture heavy as we navigate the WebApp GUI
The Phoscon WebApp
- Open the Phoscon WebApp
- If you don’t remember the address you can use the discovery tool to find it http://phoscon.de/app
- If you are prompted to create a group click the X in the corner as well will complete this step later

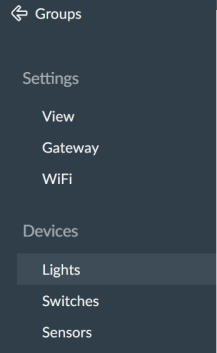
- Click the hamburger menu in the top left and a new menu will slide out.
- The devices section is where we will add lights, switches and sensors.
- Switches in this instance are not physical wall switches that are Zigbee controllable but rather refers to devices with buttons like remotes or keypads
Adding Devices
- We will now go through adding a light – In this instance a Zigbee wall dimmer
- Choose lights under the devices menu and a screen showing any lights you have already added plus an Add new light button at the bottom.
- Click Add new light to continue

- The gateway will begin searching for lights.
- Put your light in pairing mode. (This procedure varies between manufacturers)
- When a new device is found it will show on the list.
- When all lights have been found you can click the X in the bottom right-hand corner

- Repeat the device adding procedure for any switches or sensors you intend to use
- Lights and other devices can be renamed to something more useful by clicking on the devices name in the device list
- Then click the Pencil icon to enter a new name

Adding Groups
- Once complete click the Arrow in the top left of
the screen. You should be re-prompted to add your first group.
- Click Create first group
- If not simply click the Add group button

- Name your group and click Create

- You will be presented with an empty group click the Gear Icon labelled Edit

- Initially, only the Manage lights option is available so choose it

- The Available lights screen will come up

- If you didn’t previously rename your lights and
unsure which is which. Click the name and the light will begin to pulse. And
the Identify light window will appear.
- You can rename the light here if you’d like
- Click Ok when done

- You will return to the list of lights click the + next to any lights you wish to add to this group. Then click Save

Linking Control Devices
- Choose the Arrow in the top left to return to the Group Editor. You will see that we now have more options available. Depending on if you added Switches or Sensor one or both will be available. I’m going to add a switch so will click Switch editor

- As there are no switches currently assigned I will click the Link Switch button

- Click the desired Switch then click Next

- Select a button to configure then click Next

- Choose an Action for the button. In this instance, I’m choosing an On/off action that performs a toggle. Then click Apply

- When returned to the Key assignment screen you can click + to assign actions to additional buttons.

- At this point, your Phoscon Zigbee Gateway should provide a working control system for your Zigbee endpoints.
- You can configure schedules, scenes, motion controls, etc. in much the same way as button controls
- This effectively replicates the basic functions of any other available hub devices
What’s Next?
If all you are attempting to achieve is the steps we have done so far, you may be better served by a ready to go Zigbee gateway like SmartThings, Wink, Echo Plus or similar.
The real power of this system comes with external integrations. The fourth part of this series will move all inter-device connections and automation’s external to Node-Red taking advantage of the provided Rest API.
- Introduction
- Installation
- You are Here
Node-Red Integration– Don’t use this one anymore- Better Node-Red Integration
We originally contributed this series of articles to the Smarter Home Club Blog starting on November 11, 2018. We are reposting it here to ensure our content remains available to all. Small corrections for grammar and spelling or dead links may have been made in the reposting.


